


How to Multimeter Continuity Test: A Complete Guide for Beginners
When working with electrical circuits, one of the most important things to check is whether current can flow freely through a wire or component. This is where a continuity test comes in. Knowing how to multimeter continuity test correctly can save you hours of frustration when diagnosing problems in electrical systems. Whether you are fixing a home appliance, working on a car, or troubleshooting a circuit board, understanding how to perform this test is an essential skill.
What is a Continuity Test?
A continuity test checks if there’s a complete path for current to flow in a circuit. In simple terms, it tells you whether electricity can travel from one point to another without interruption. If a wire or connection is broken, corroded, or poorly connected, the multimeter will show that there is no continuity. A good connection means the circuit is complete, while a bad connection means the circuit is open or broken.
Why Continuity Testing Matters
Continuity testing helps you verify the health of electrical components and connections before applying power. This reduces the risk of damaging your equipment or creating a short circuit. Electricians, technicians, and DIY enthusiasts use this test to identify broken wires, faulty fuses, damaged switches, and poor solder joints. It’s a quick and safe way to pinpoint where a problem lies. Learning how to multimeter continuity test properly ensures accurate results and helps prevent costly mistakes.
What You Need Before Testing
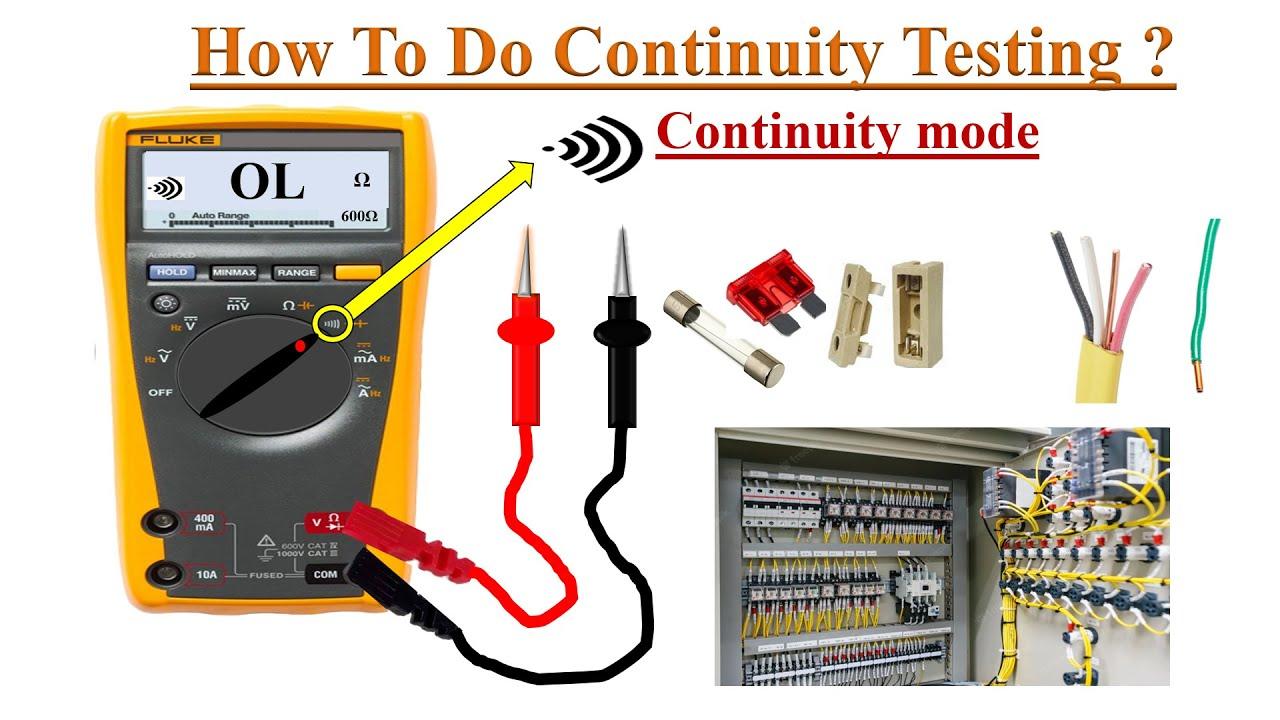
To perform a continuity test, you’ll need a digital multimeter with a continuity mode. Most multimeters have a small diode symbol or a soundwave icon that represents this function. You’ll also need access to both ends of the wire or component you’re testing. Make sure the circuit is powered off before you begin. Testing live circuits can damage your multimeter and pose a serious safety hazard.
Step-by-Step Guide on How to Multimeter Continuity Test
-
Turn Off the Power:
Always start by turning off power to the circuit or device you are testing. If it’s plugged in, unplug it. If it’s connected to a battery, remove the battery. Safety comes first. -
Set the Multimeter to Continuity Mode:
Rotate the dial on your multimeter to the continuity test symbol. When you do this, the device becomes ready to check if there’s a continuous electrical path between two points. -
Test the Multimeter Itself:
Before testing a circuit, touch the two probes of the multimeter together. If the multimeter is working properly, you’ll hear a beep or see a reading of zero or near zero on the screen. This confirms that the multimeter is functioning and ready to use. -
Touch the Probes to the Component:
Place one probe on each end of the wire, fuse, switch, or component you want to test. If the circuit is continuous, the multimeter will beep or display a low resistance value. If you don’t hear a sound or the display shows “OL” (open loop), it means there is a break or poor connection in the circuit. -
Interpret the Results:
A steady beep or reading near zero ohms means continuity exists. This indicates that the path is complete and current can flow. No beep or a reading showing “OL” means there’s a break somewhere along the line. This helps you narrow down where to look for the issue.
Common Mistakes to Avoid
One of the biggest mistakes beginners make is performing a continuity test on a live circuit. This not only risks damaging the multimeter but can also result in injury. Another common error is misinterpreting readings. A beep doesn’t always mean the component is functioning properly; it only confirms that there’s an electrical path. For example, a shorted wire might also show continuity. Always double-check components under their proper testing mode if needed.
Practical Applications of Continuity Testing
Knowing how to multimeter continuity test is useful in a variety of situations. You can use it to check if extension cords are intact, ensure that fuses haven’t blown, or verify that switches and relays are making proper contact. In automotive work, it’s used to test wiring harnesses and connectors. In household repairs, it helps confirm that outlets, lights, and appliances have proper internal connections.
Final Thoughts
Learning how to multimeter continuity test gives you confidence when working with electrical systems. It’s a simple procedure that provides quick answers about circuit integrity and component condition. Once you get comfortable with your multimeter, you’ll be able to identify and solve electrical problems faster and safer. Whether you’re a professional technician or a DIY repair enthusiast, mastering this basic skill will make your electrical work far more efficient and reliable.
Follow Us On Tiktok For More Information:
https://www.tiktok.com/@origin_data
